Description
Htek UC840 Configuration and Usage Guide
Prerequisites
- Must have a pbx account and a htek phone
Table of Contents
Manual SIP Configuration Process
- Step 1 – Access Page
- Step 2 – Account Navigation
- Step 3 – Account Selection
- Step 4 – Account Configuration
Auto Provsioning
- Step 1 – Knowing the MAC Address
- Step 2 – Adding Device For Auto-Provisioning
- Step 3 – Extension Assignment
- Step 4 – Auto Provision
- Step 5 – Config Server Path
- Step 6 – Save and Restart
Transferring Calls
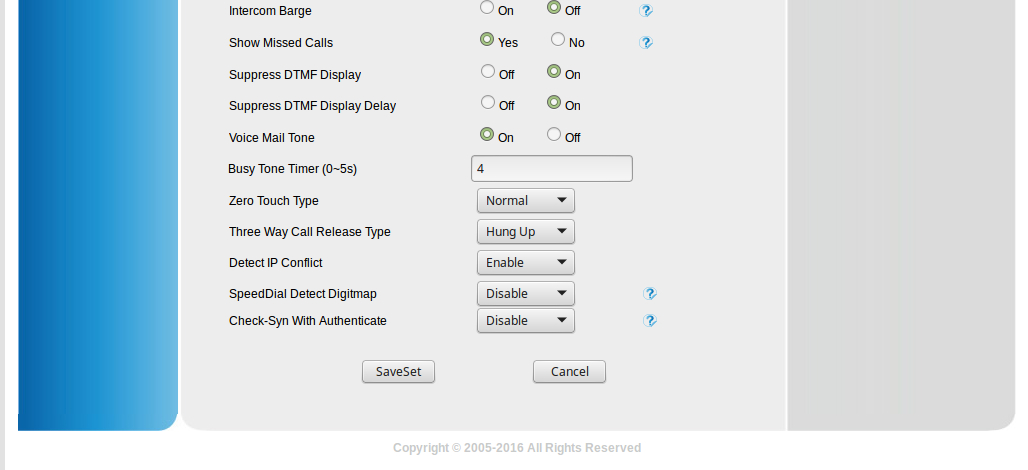
Volume Amplification Settings
Factory Reset
Manual SIP Configuration Process
Step 1 - Access Page
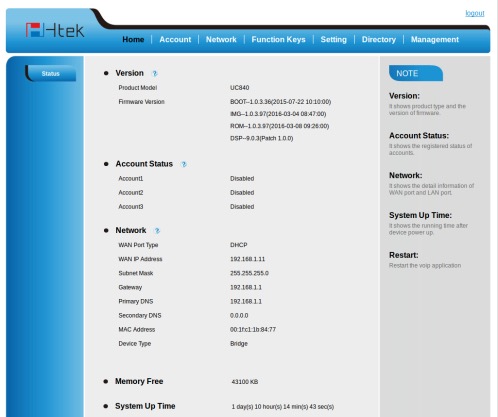
Input the IP address (Press Menu →Status →Information) of your Htek into the address bar of your browser. The default username and password will be admin once logged in you should see the above page render.
Step 2 - Account Navigation

Click on the Account tab as shown above
Step 3 - Account Selection
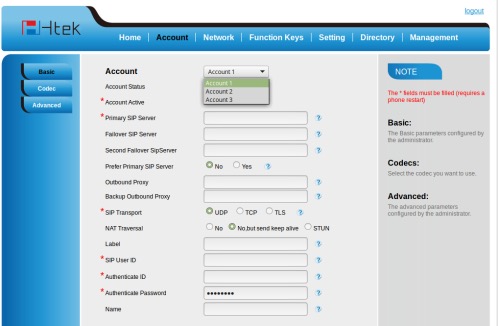
Select an account to configure using the dropdown list as shown above
Step 4 - Account Configuration
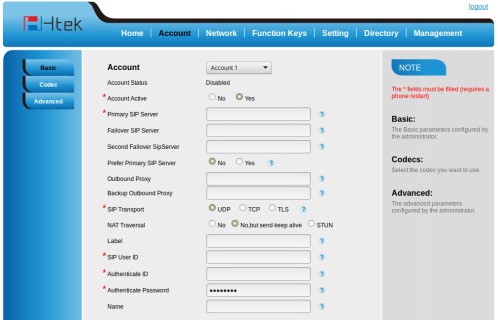
- Make sure
Account ActivehasYesselected. - Input the PBX domain into the
Primary SIP Serverfield. - Ensure
UDPis selected for theSIP Transportfield. - Unless otherwise directed select
No, but send keep alivefor theNAT Traversalfield - Input the extension number for the extension you intend to register to this account in the
SIP User IDfield - Input the extensions password into the
Authenticate Passwordfield. - Click the
SaveSetbutton found at the bottom of the page.
Step 5 - SIP Port Staggering
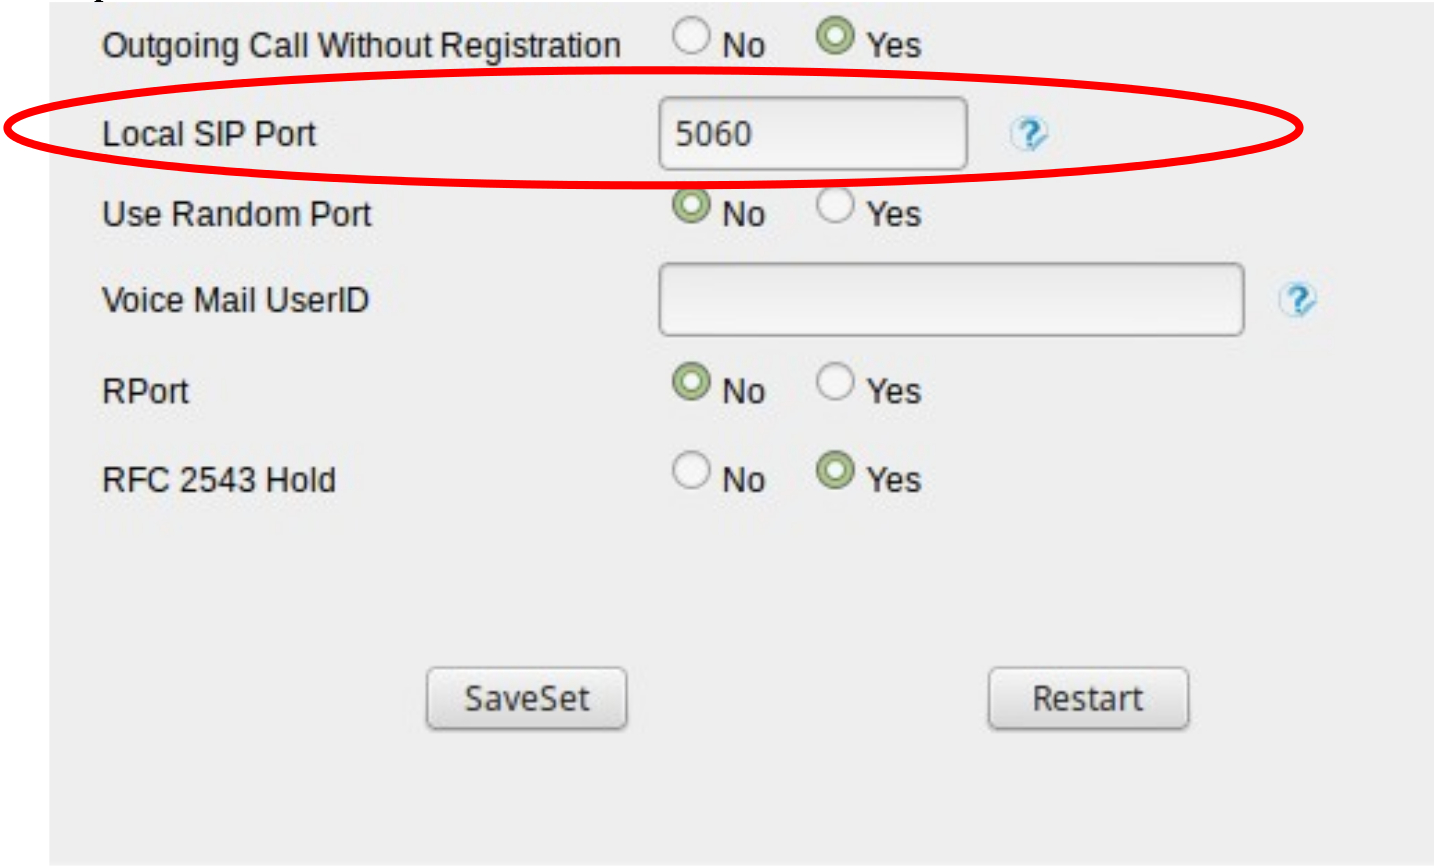
Be sure to consider all the SIP registrations on your LAN, make sure each SIP registration both from VOIPo and other VOIP providers you have on your LAN aren’t trying to use the same SIP port. You can help avoid SIP registration conflicts by inputting a SIP port in the 5060-5098 range that isn’t used by other SIP devices in the Local SIP Port field accordingly.
Auto Provisioning
Step 1 - Knowing the MAC Address

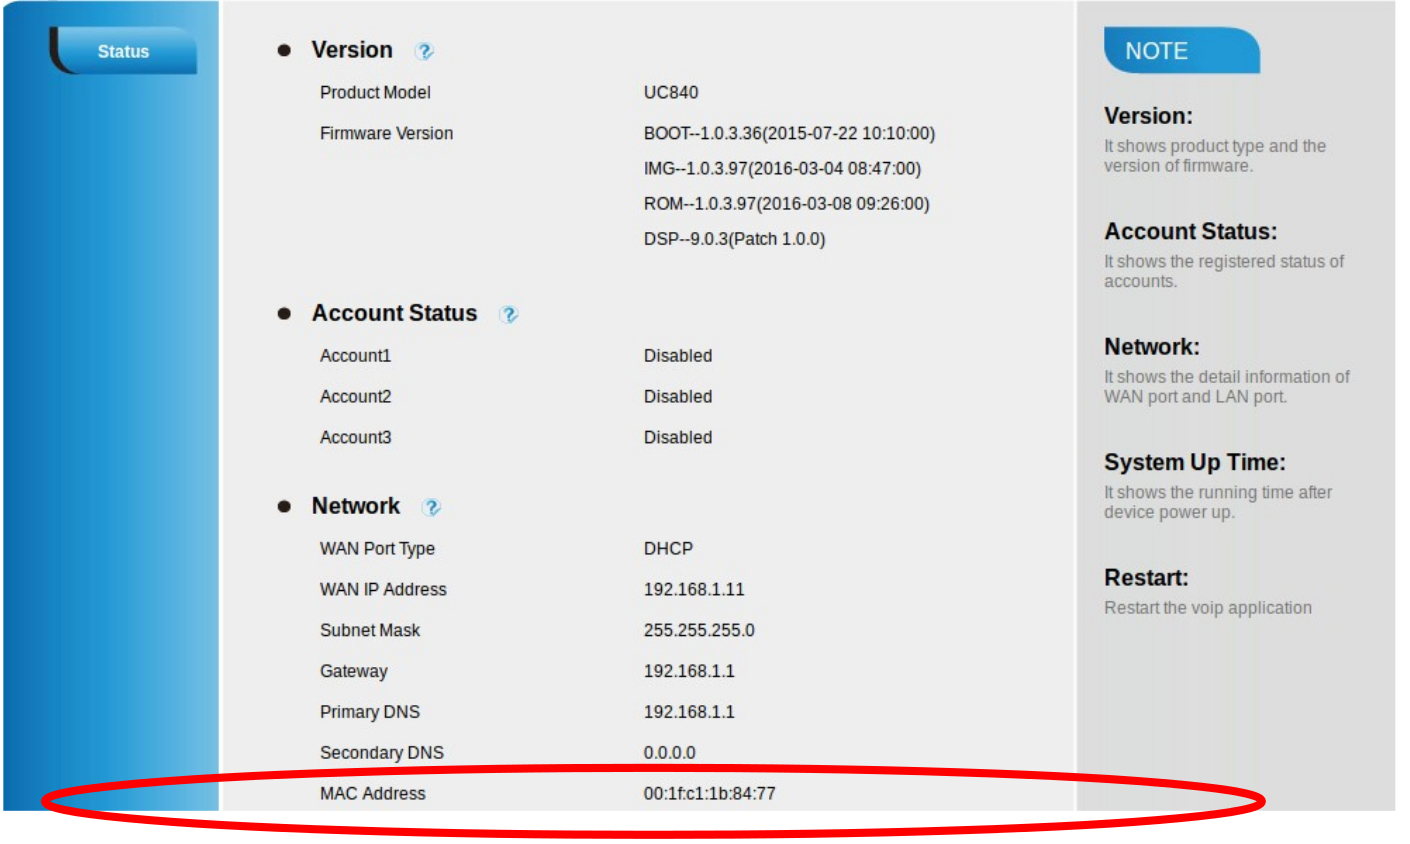
To begin you will need to know the MAC address of your Htek phone. Input the IP address (Press Menu →Status →Information) of your Htek into the address bar of your browser. The default username and password will be admin. Once logged in click on the Home tab as shown above
You`ll see the MAC address rendered in the page as shown above
Step 2 - Adding Device For Auto-Provisioning

1. Log into the PBX and click the Provisioning tab at the top of the page.
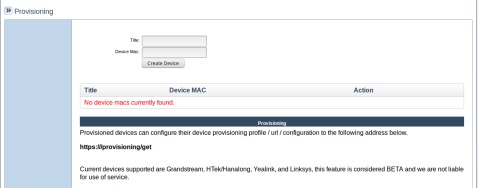
2. Input the extension number in the Title field.
3. Input your Htek’s MAC address into the Device Mac field and click Create Device
Step 3 - Extension Assignment
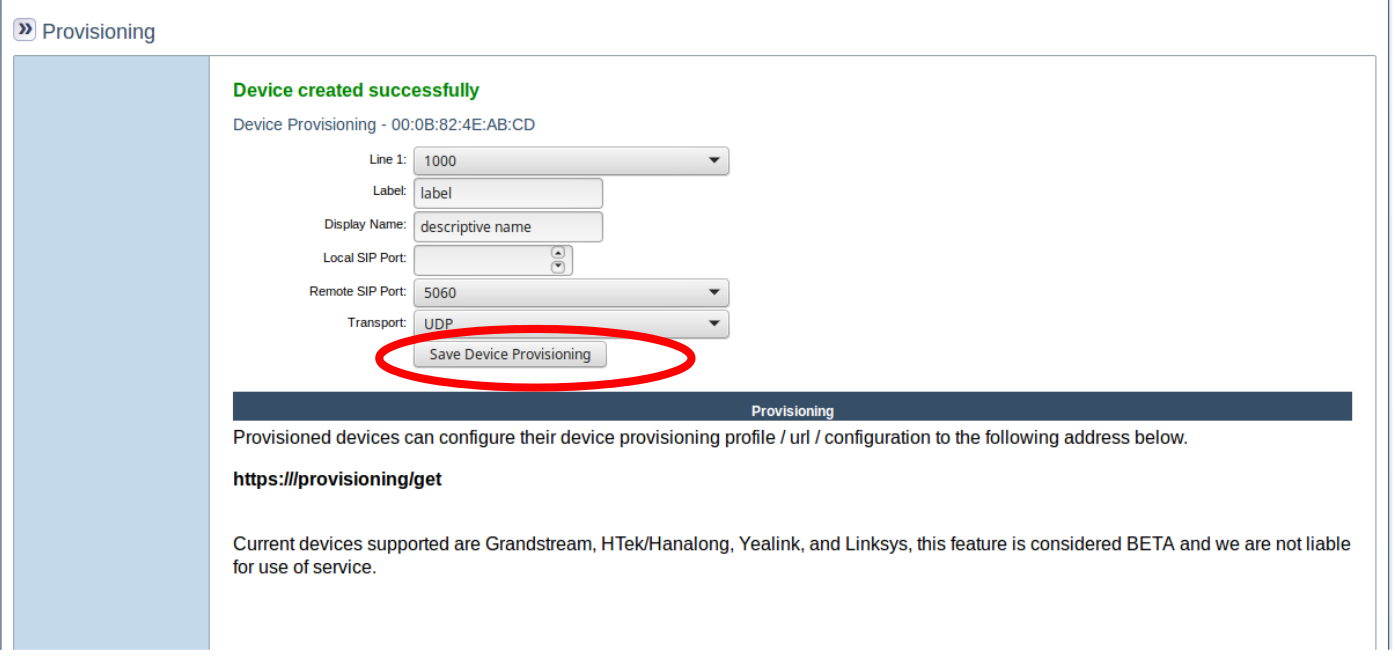
- Select an extension to tie the device to using the
Line 1dropdown list as shown above. LabelandDisplay Nameare optional fields.Local SIP Portshould be left blank unless you are otherwise directed.Remote SIP Portshould be left at the default as shown above unless you are otherwise directed.Transportshould be UDP unless you otherwise directed.- Once all is configured, click the
Save Device Provisioningbutton and feel free to close the tab in your browser.
Step 4 - Auto Provision

- Input the IP address (Press Menu →Status →Information) of your Htek into the address bar of your browser.
- The default username and password will be
admin. - Click the
Managementtab as shown above
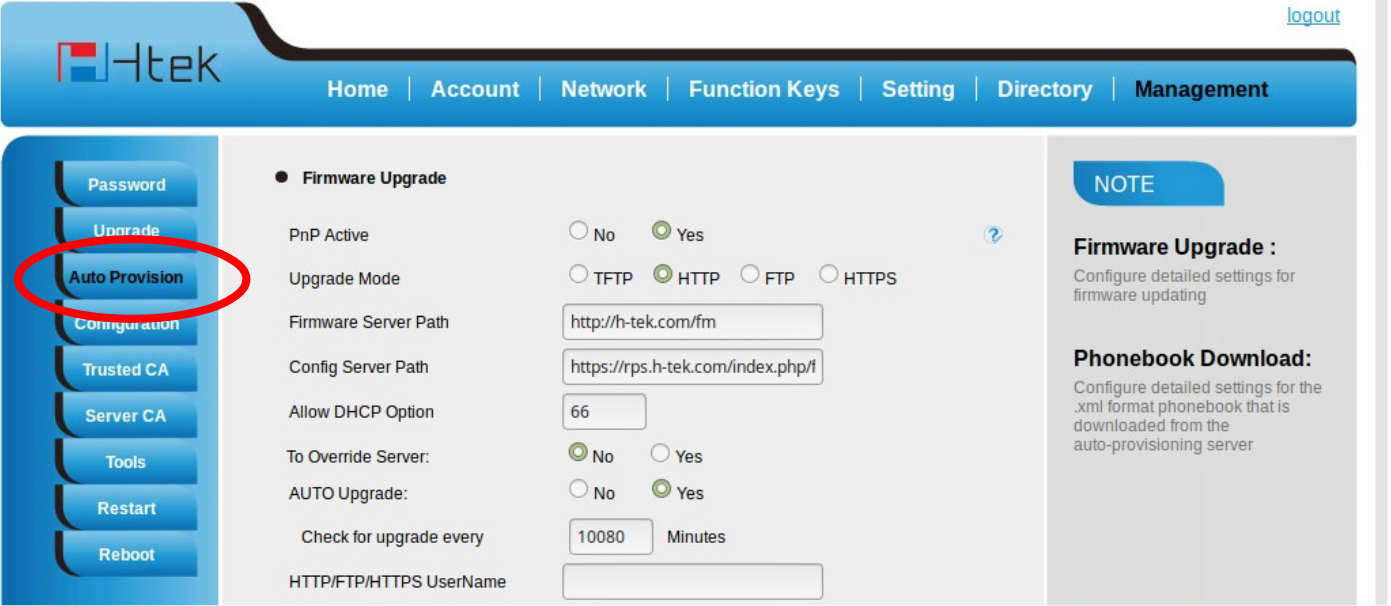
- Click on the
Auto Provisiontab
Step 5 - Config Server Path
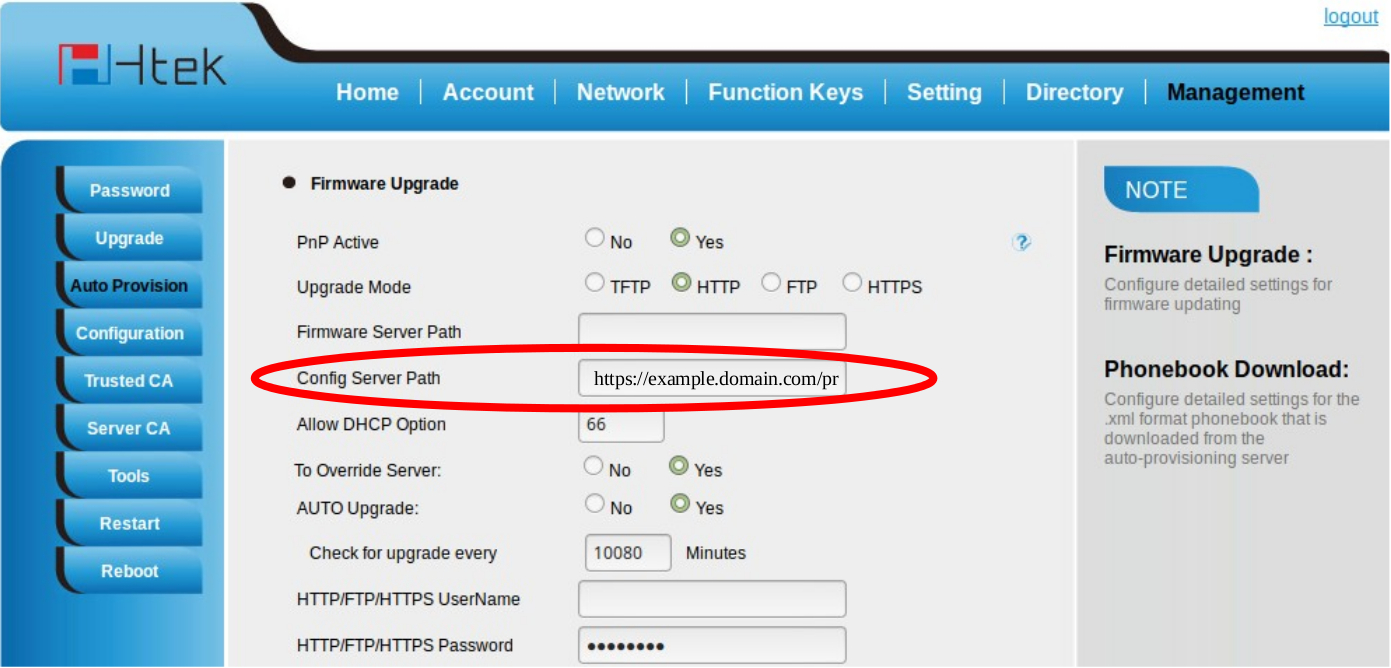
- Input your provisioning url into the
Config Server Pathfield.
Step 6 - Save and Restart
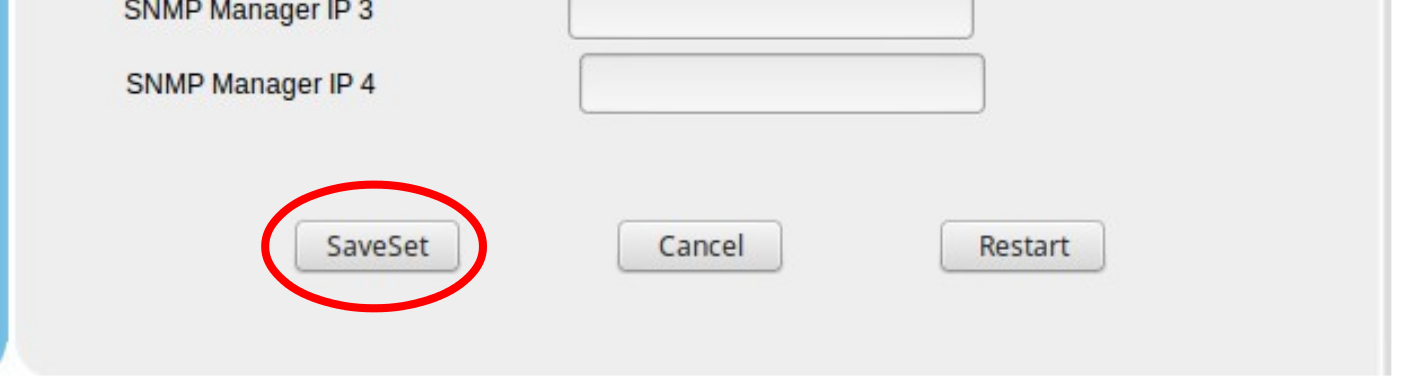
- Scroll down to the bottom of the page and click the
SaveSetbutton - Click the
Restartbutton
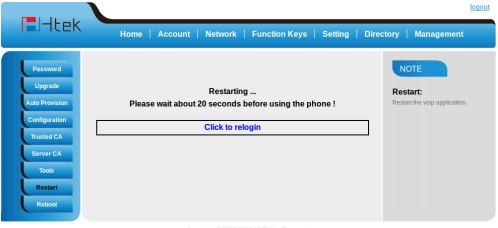
- If you need to further configure the phone, you can re-login as shown above
Blind Call Transfers
Step 1
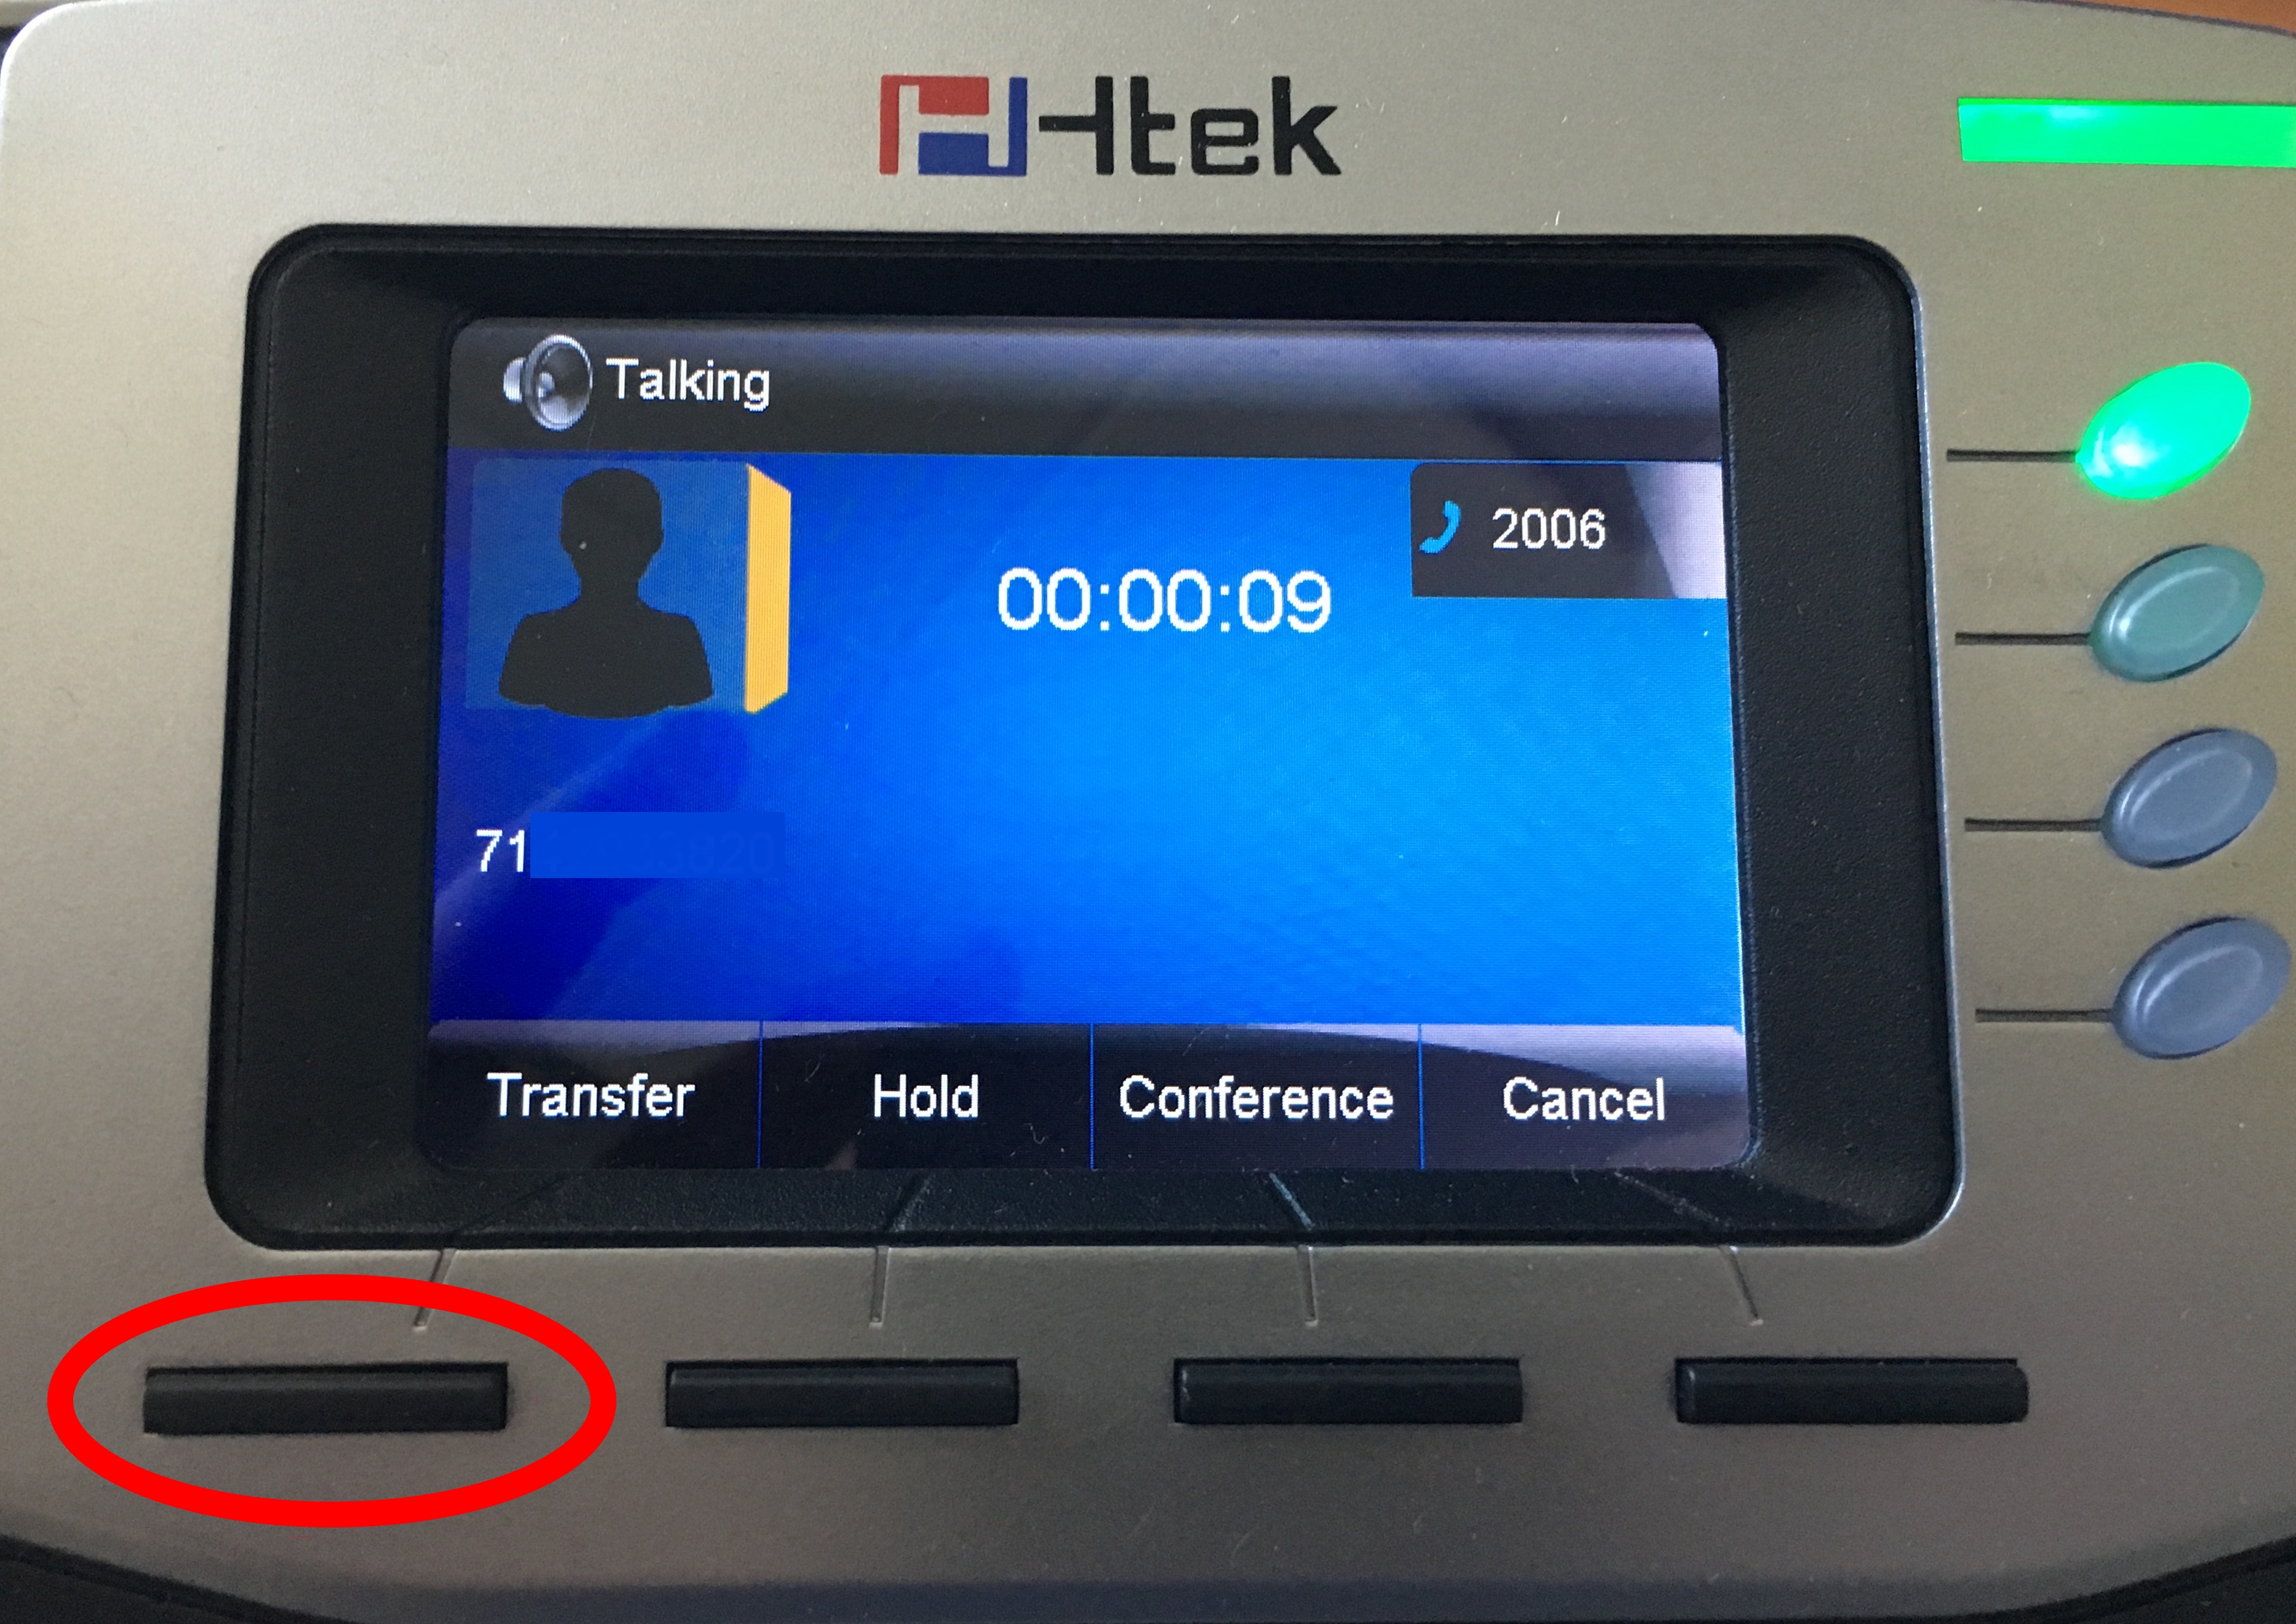 During a live call, press the button which corresponds to the
 Transfer option on the phone’s LCD screen.
Step 2
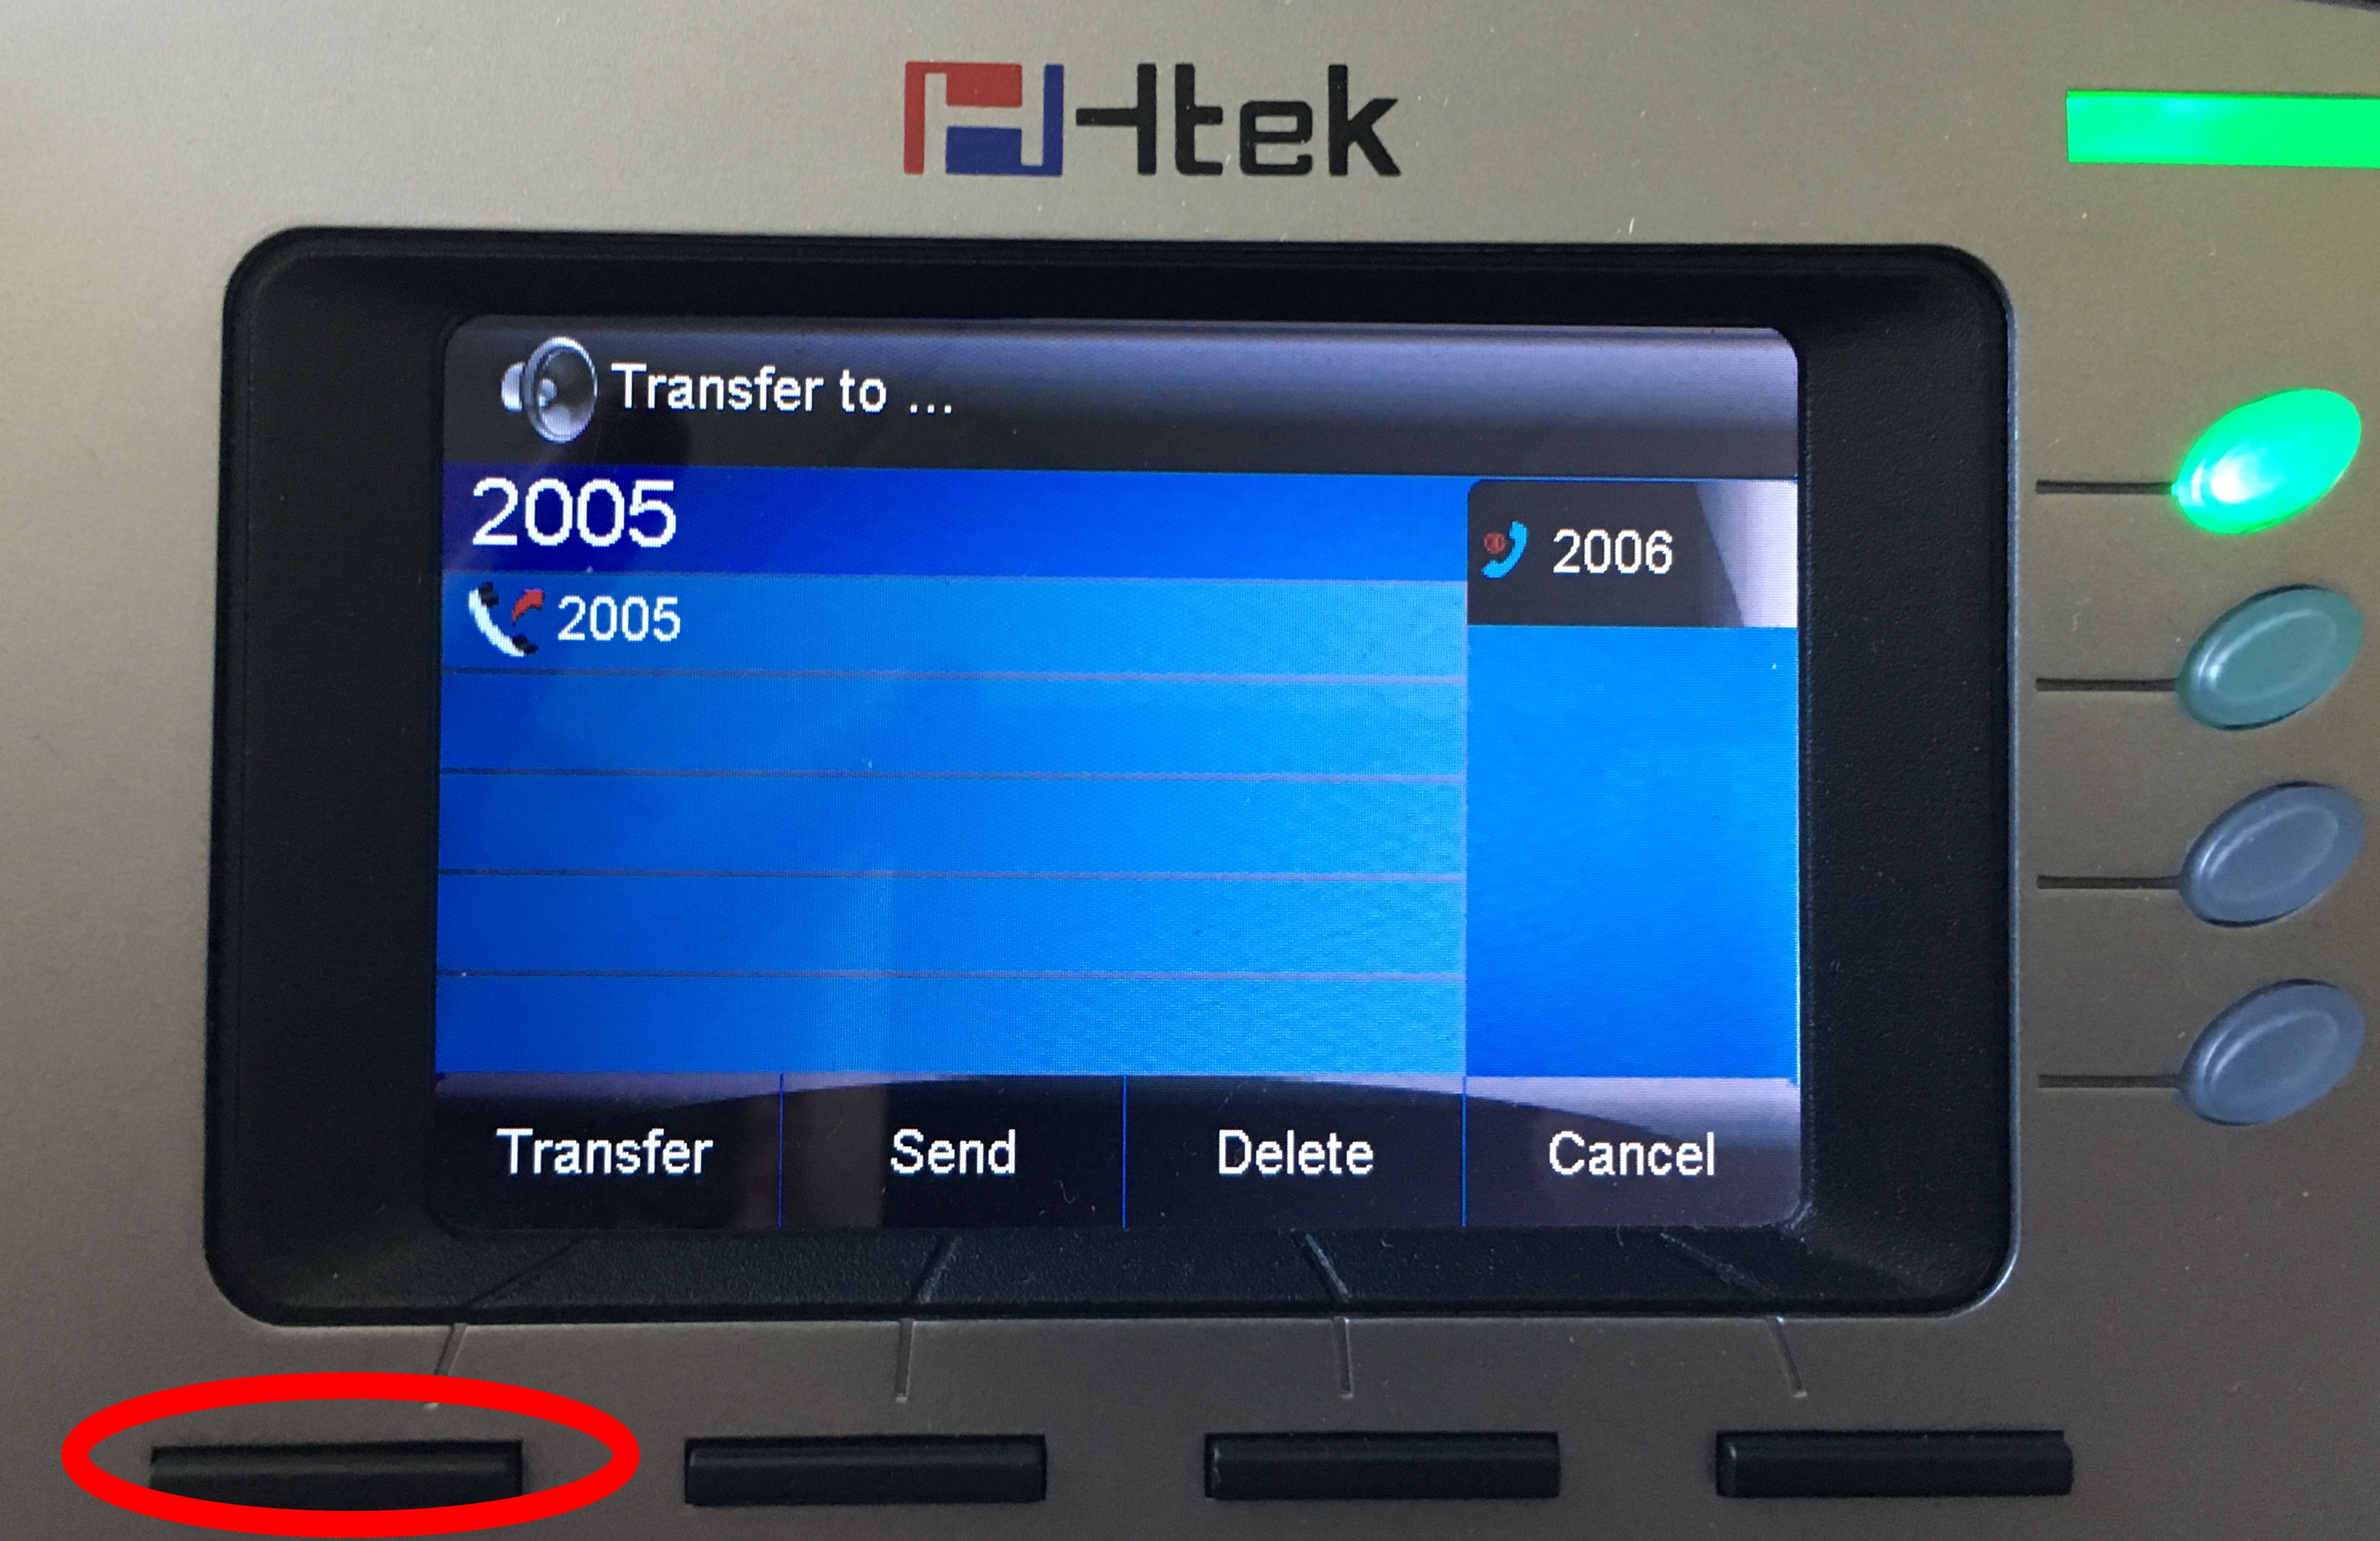 When
When Transfer to... is visible on the phone’s LCD screen input an extension or phone number and press the button which corresponds to the Transfer button on the LCD screen once more. The call should then transfer.
Attended Call Transfers
Step 1
When on a call the LCD screen on the phone should have a Transfer option visible, press the button which corresponds to this LCD menu option.
Step 2
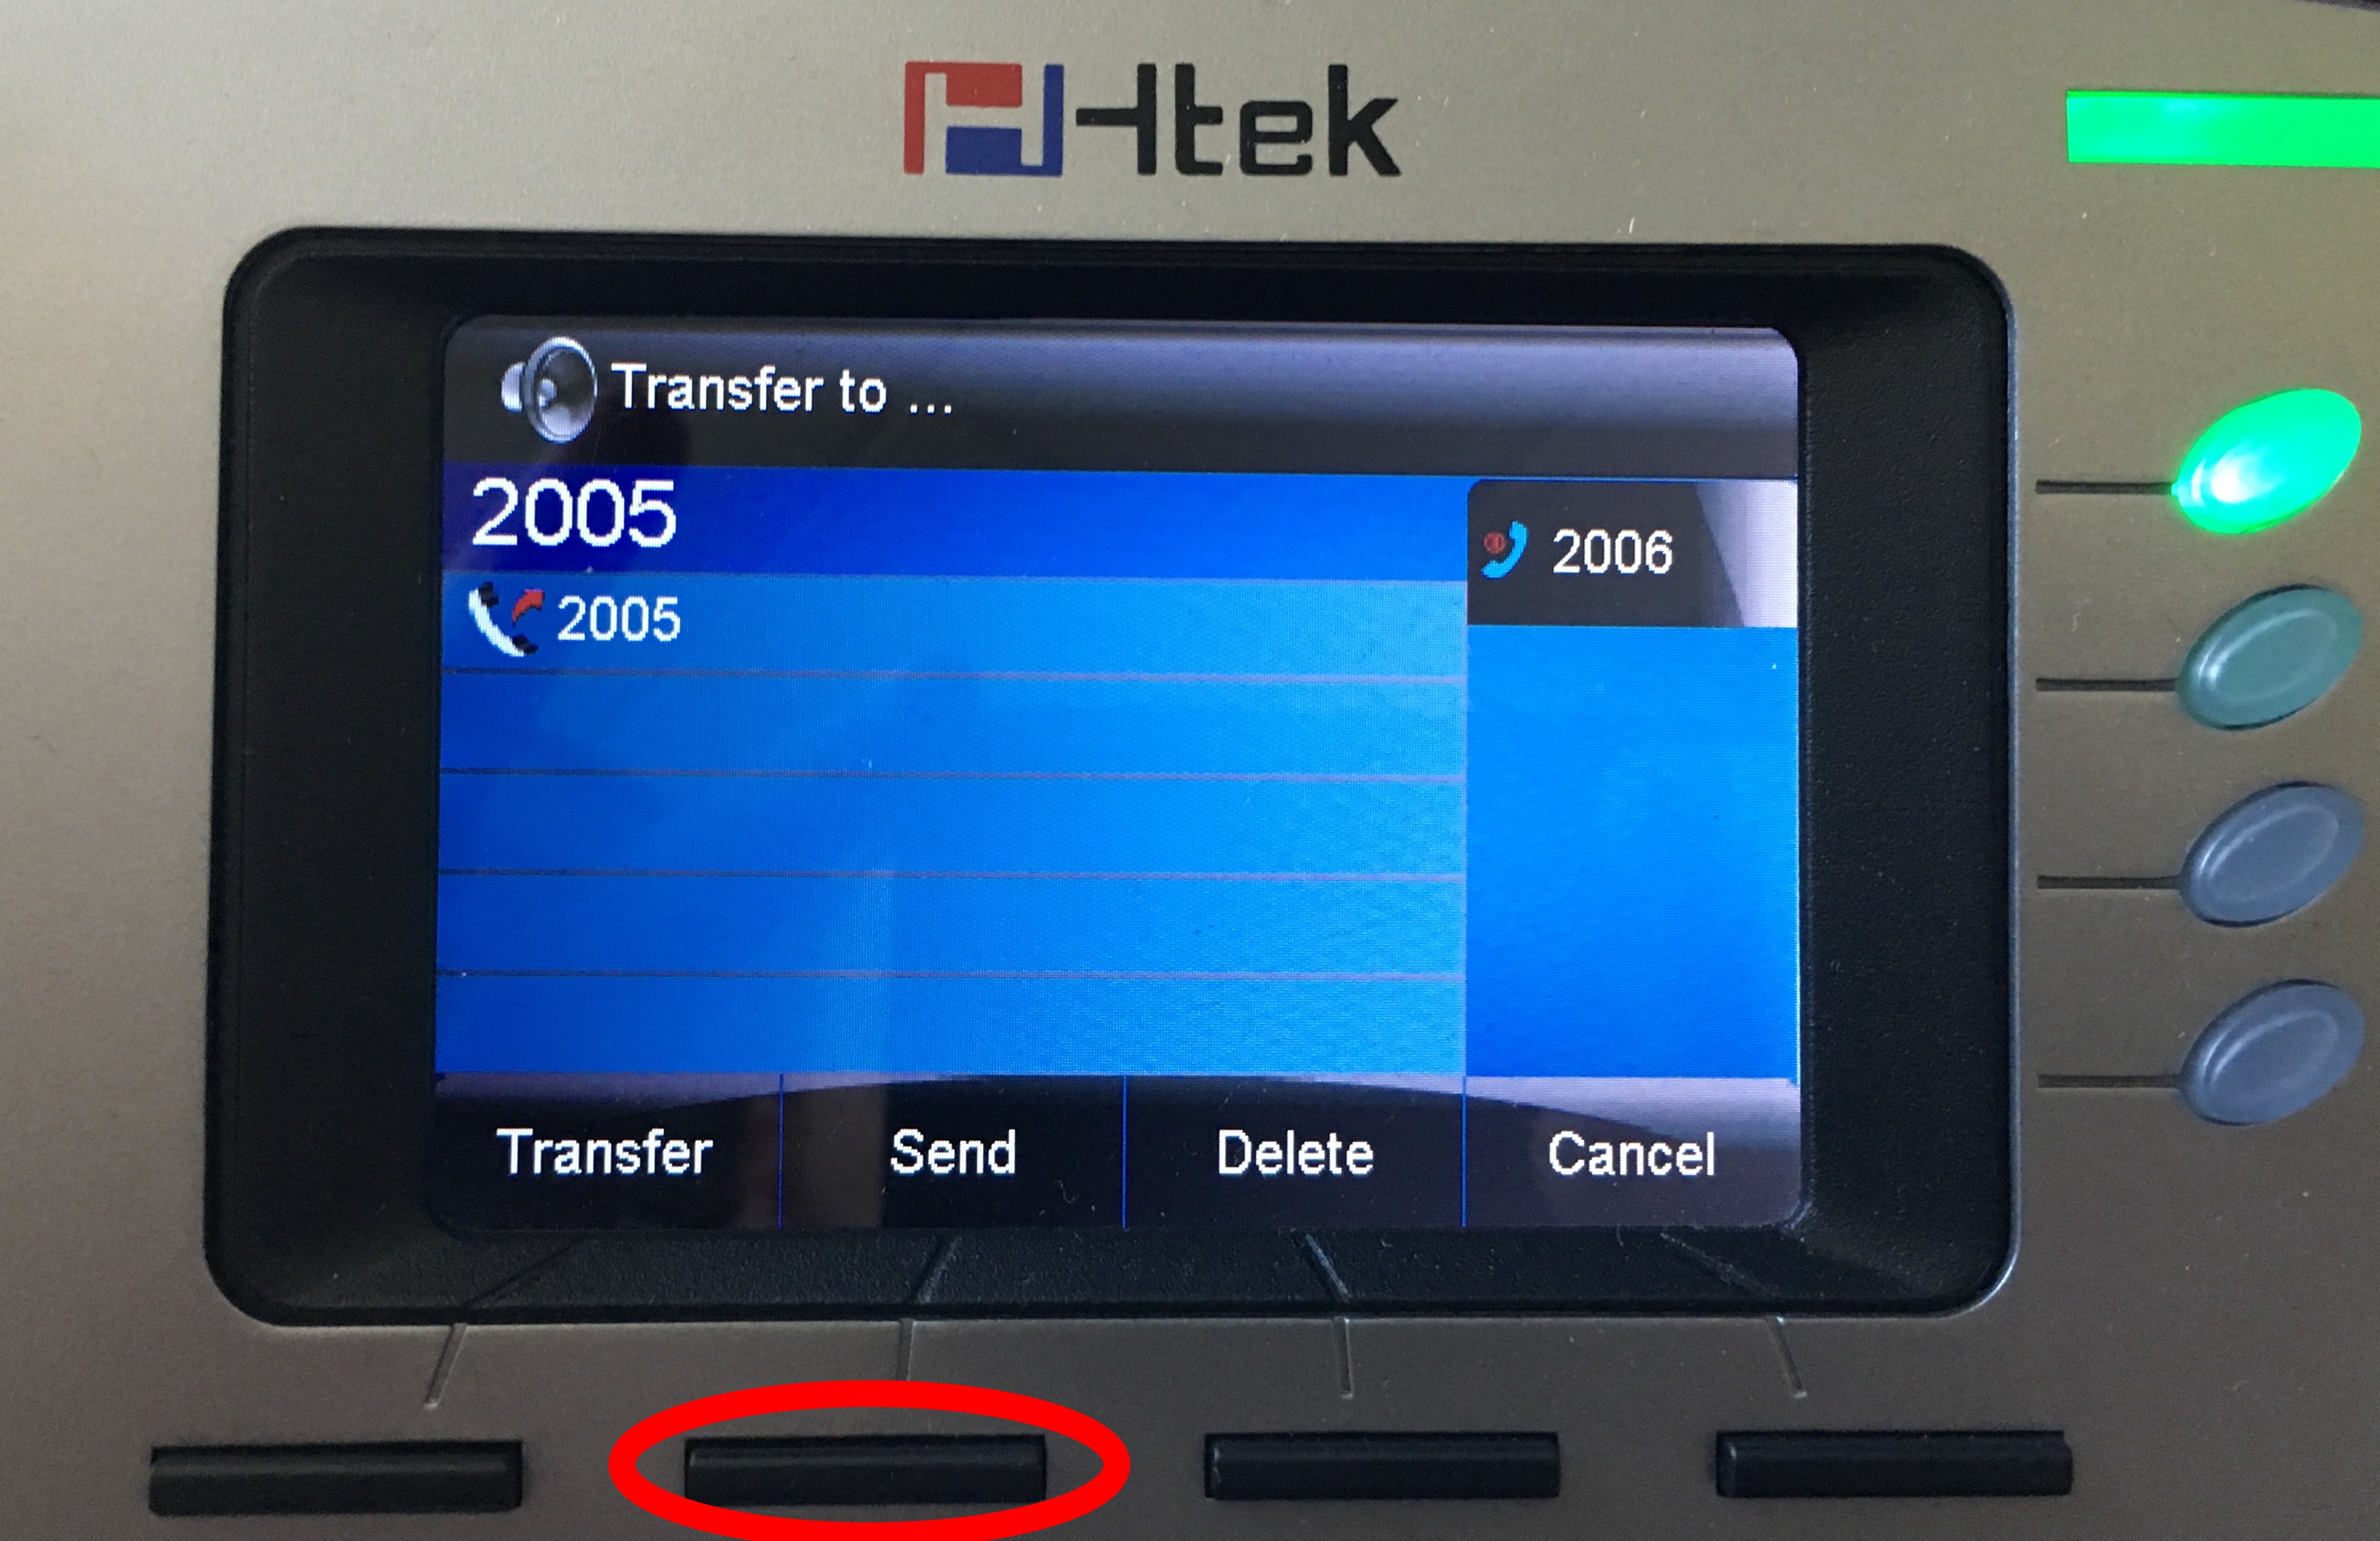 When
When Transfer to... is visible on the phone’s LCD screen input an extension or phone number to transfer the call to using the phone’s number keypad then press the button which corresponds to Send on the LCD screen.
Step 3
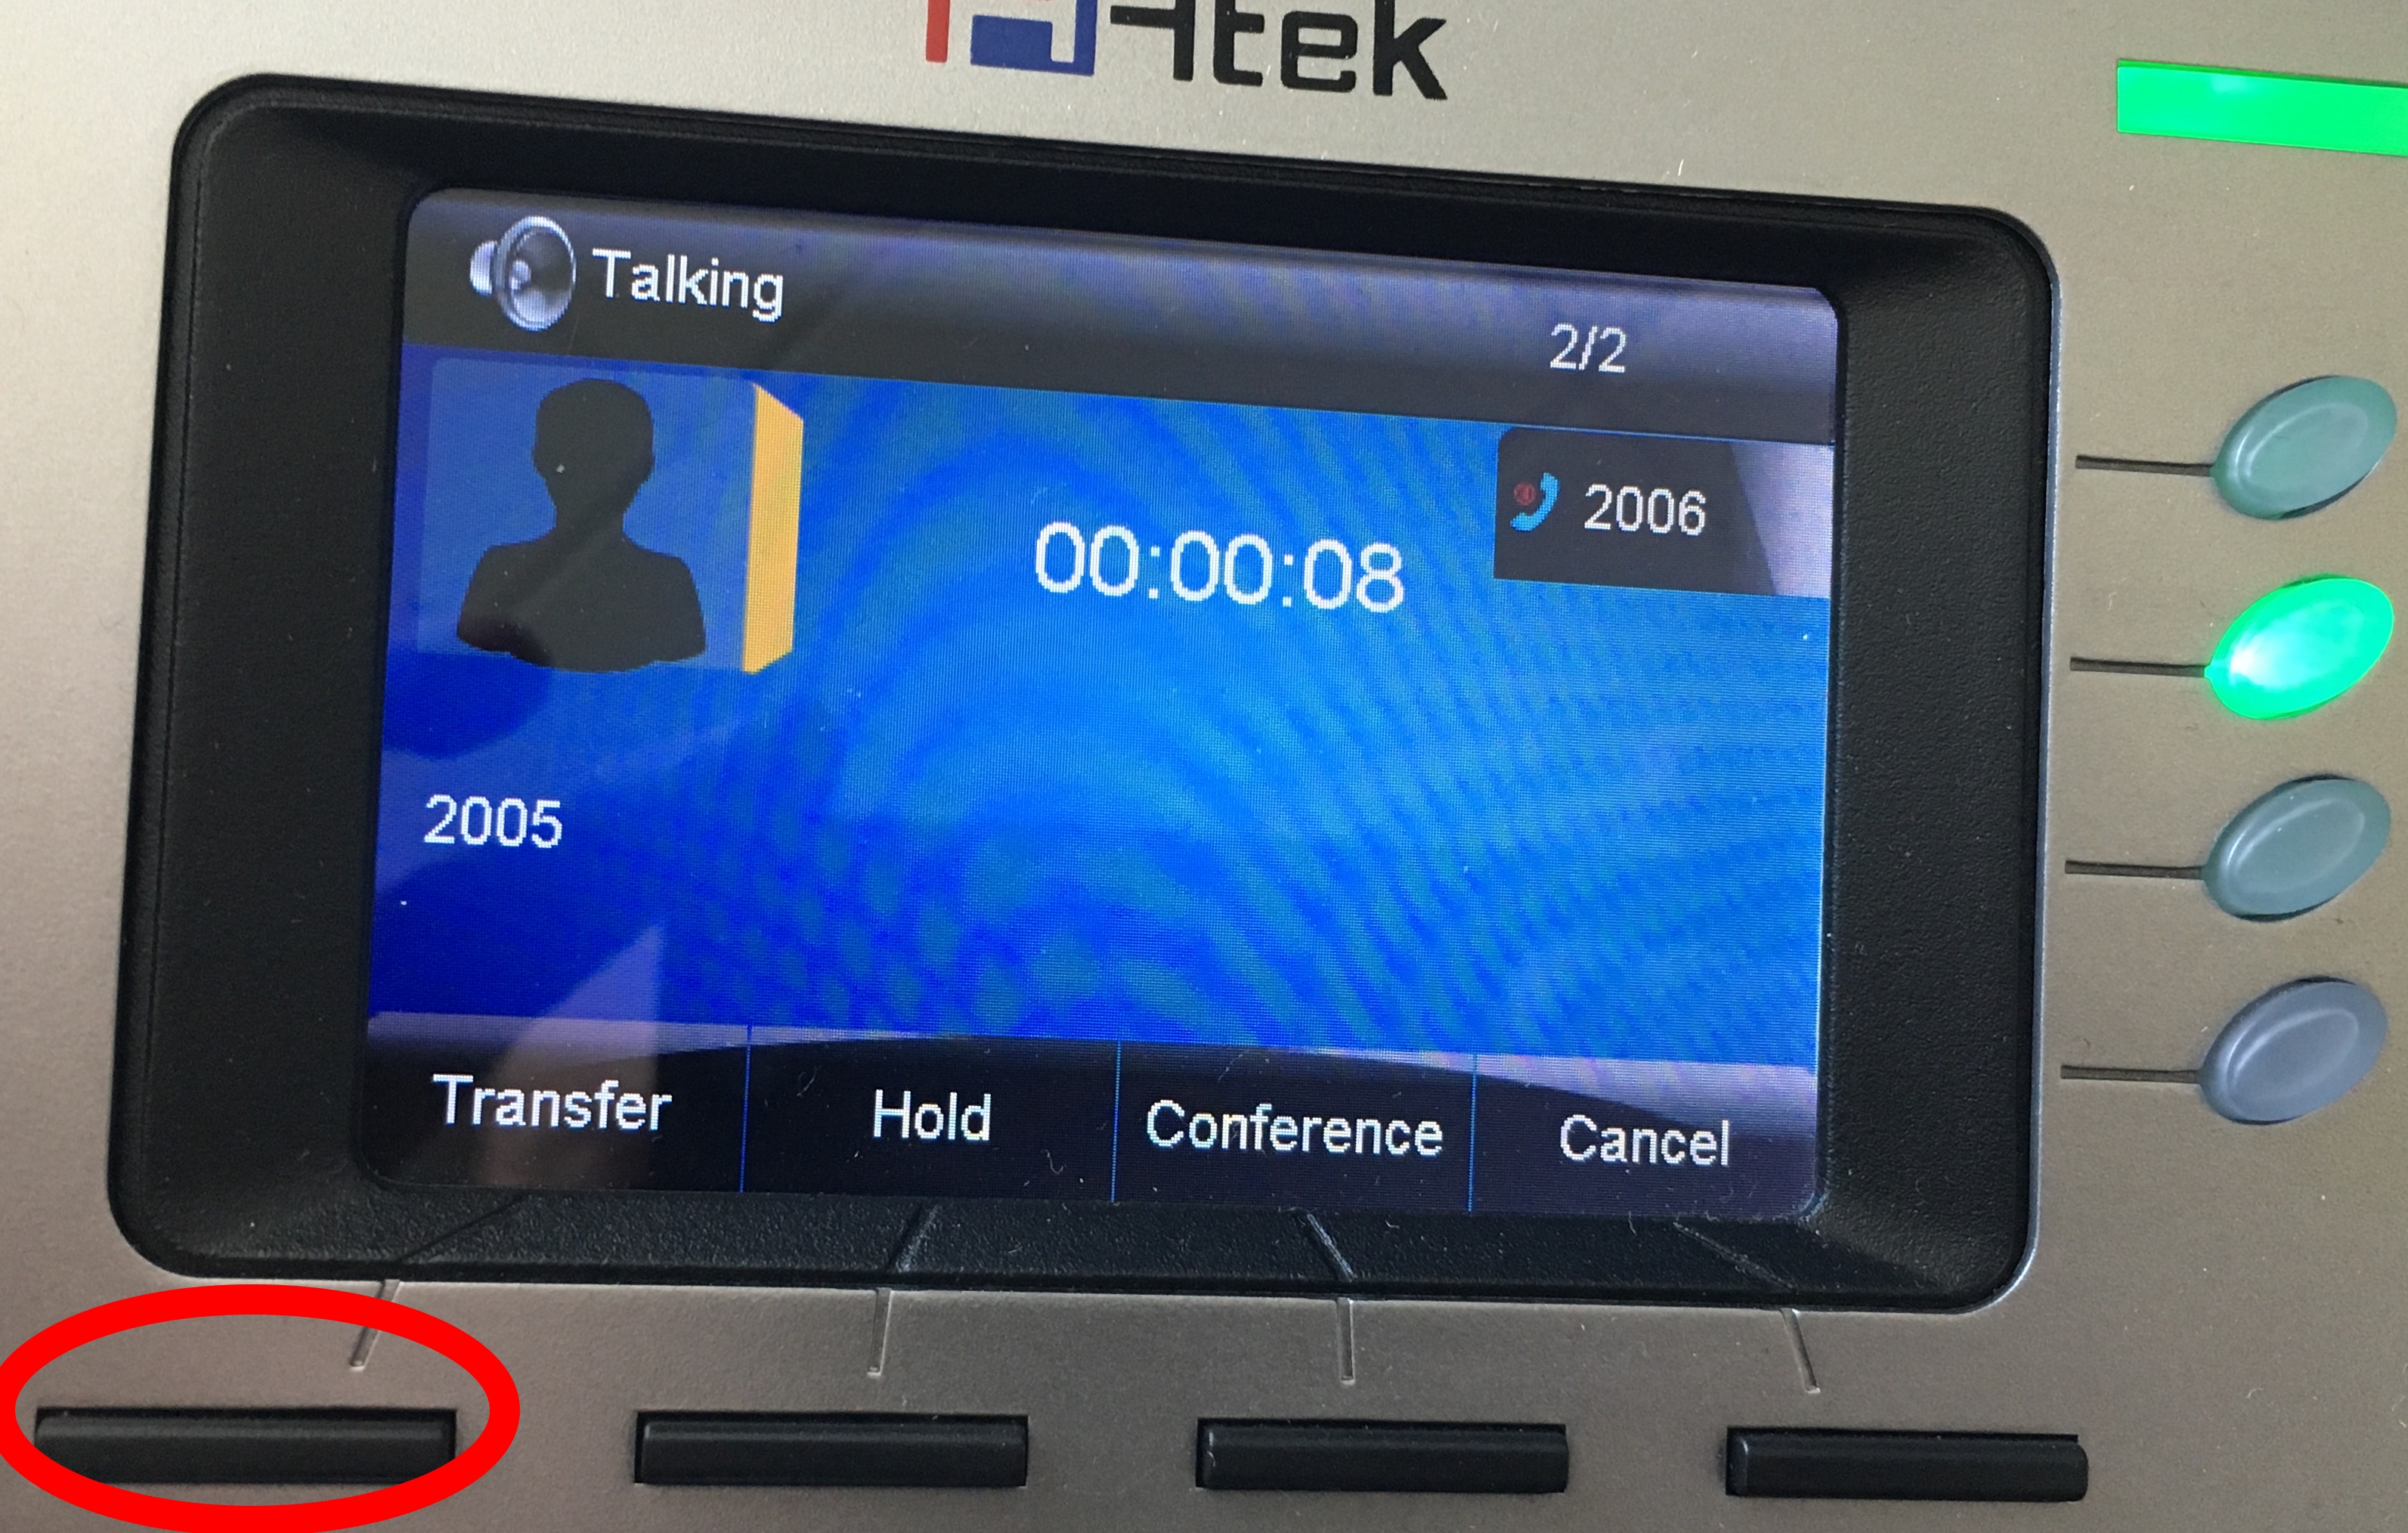 Wait for the person at the extension or phone number you are transferring the call to answer, then press the button which corresponds to the
 Transfer option on the LCD screen to complete the transfer.
Volume Amplification Settings
Overview
Setting which relate to the optimal configuration of volume amplification levels. Less than optimal settings can result in call quality issues.
Yealink Headset
Step 1
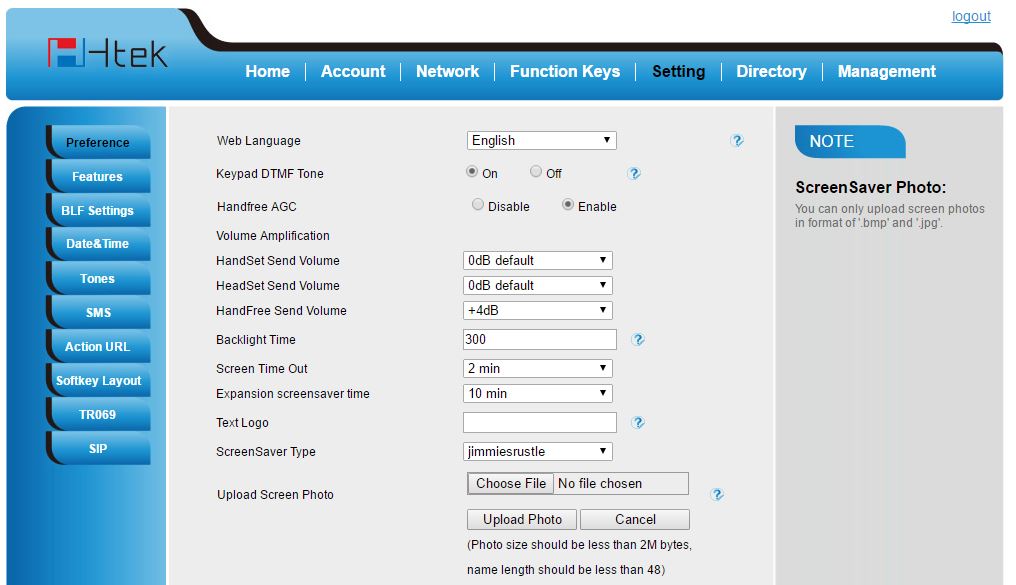 1. View of the decible settings which provide optimal performance, found under the
 Preference section of the Setting tab.
2. Ensure the HandSet Send Volume options are set to 0dB default as shown above.
3. Ensure HandFree Send Volume is set to +4dB as shown above.
Step 2
 Scroll down to the bottom of the page and click the
 SaveSet button to save the settings.
Factory Reset
Step 1 - Enable Reset
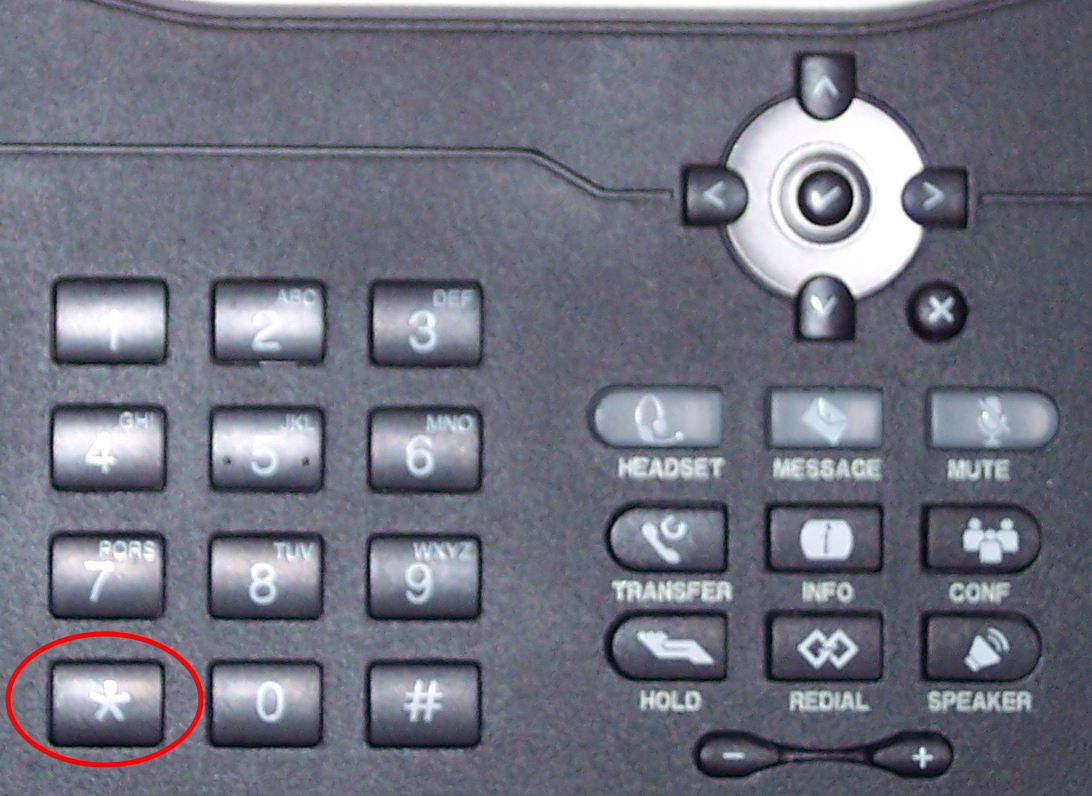
1. Press the Star button * 3 times.
Step 2 - Initiate Reset
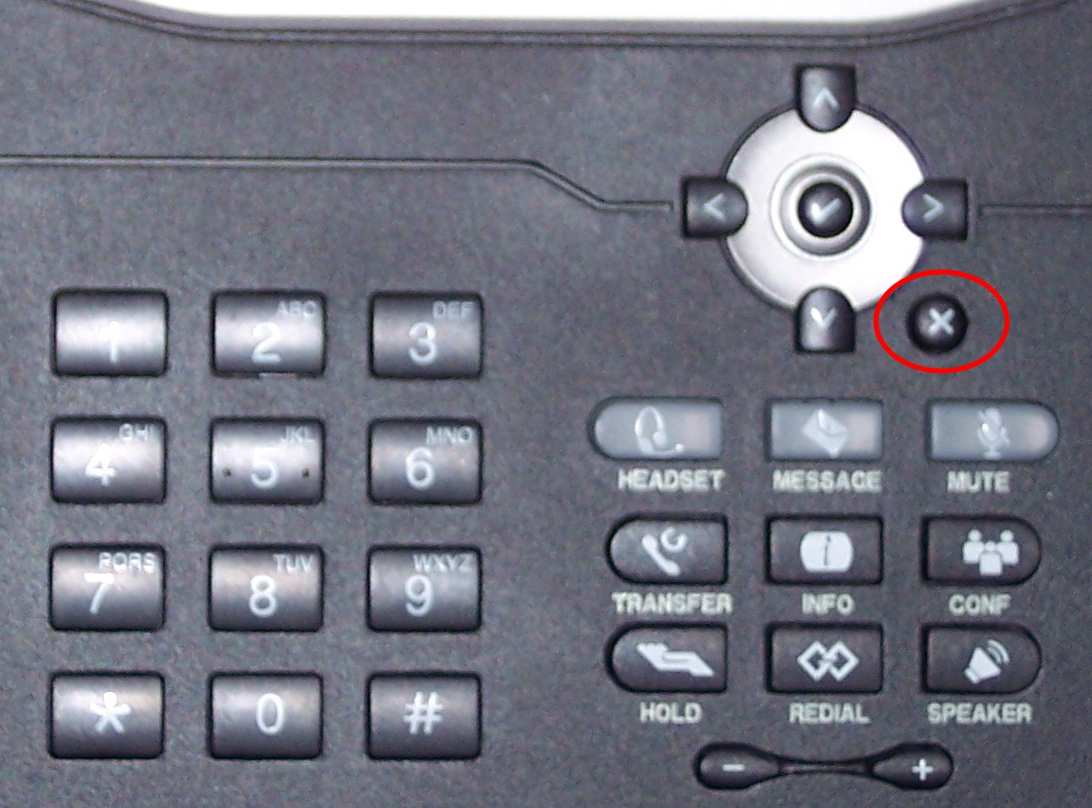
2. Press and hold the x button for at least 10 seconds.
3. Release the x button and wait for the phone to reset and reboot, this will take several minutes and the phone LCD screen may freeze up for a minute or more before providing any prompts.