Description
SIP Extension Configuration Guide
Prerequisites
- Must have a pbx account
- Must have created a SIP extension
Table of Contents
- Step 1
- Step 2 – Extension Selection
- Step 3 – Profile Setup
- Step 4 – Music On Hold
- Step 5 – Extension Timeout
- Step 6 – Voicemail Selection
- Step 7 – Call Forwarding
SIP Extension Configuration
Step 1

- Click the ‘Extensions’ tab of PBX vPanel
Step 2 - Extension Selection
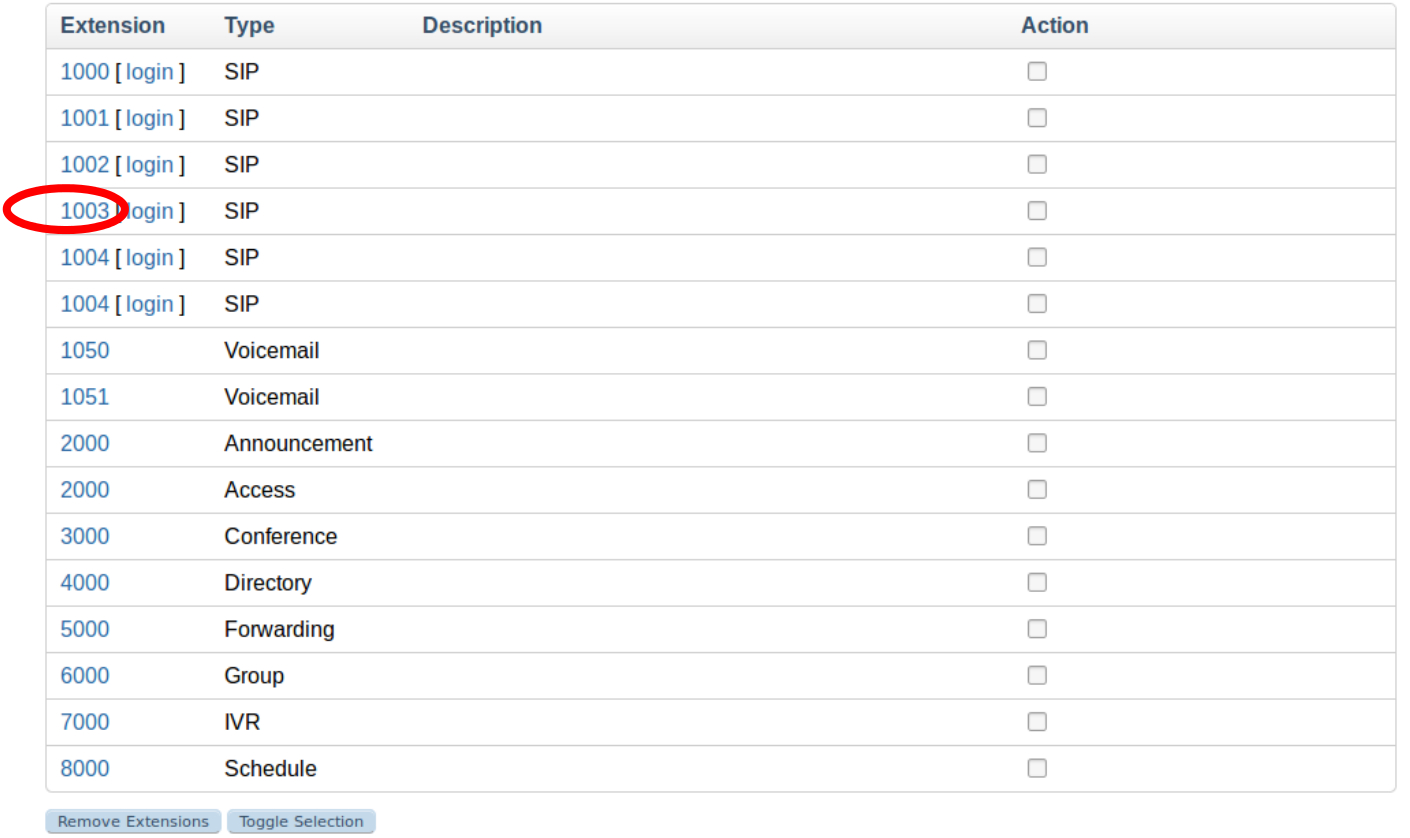
- In the list of extensions click on the SIP extension you wish to configure
Step 3 - Profile Setup
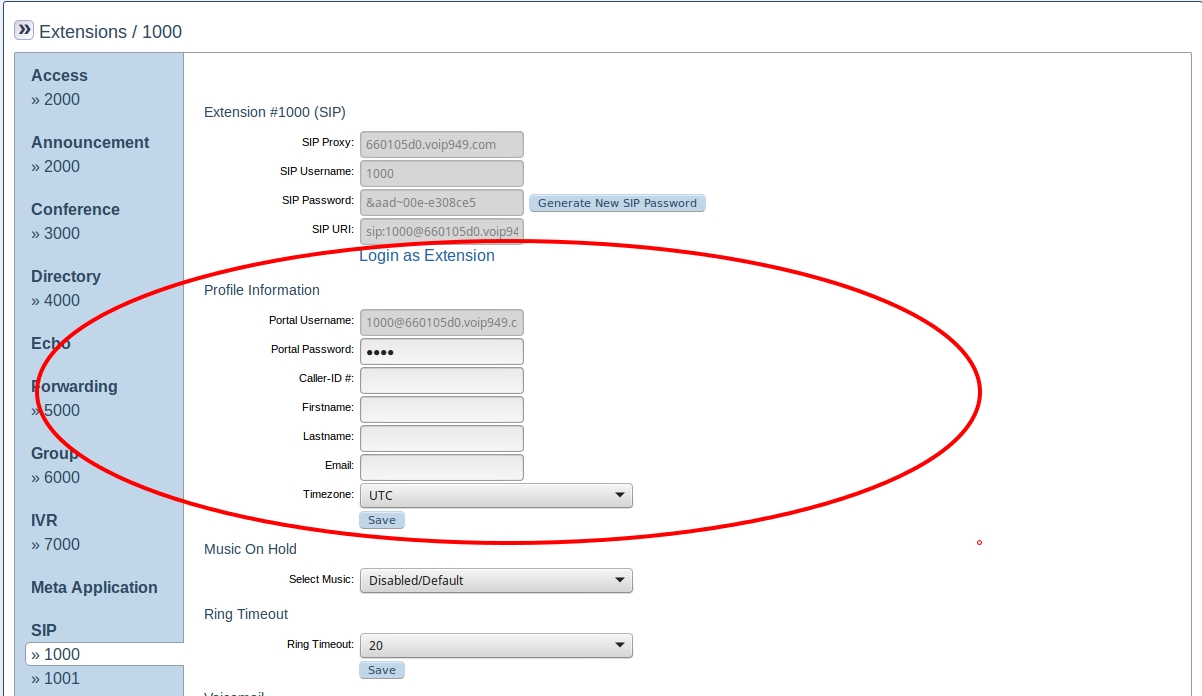
- Adjust the
Portal Passwordfield to a desired password. - Adjust the
Caller-ID #field to match the caller ID you desire or leave it blank there are some limitations with using toll free numbers as the caller ID. - Adjust the
FirstnameandLastnamefields or leave them blank. - Adjust the
Emailfield to a desired address or leave it blank. - Set the Extension profiles timezone using the
Timezonefield.
Step 4 - Music On Hold
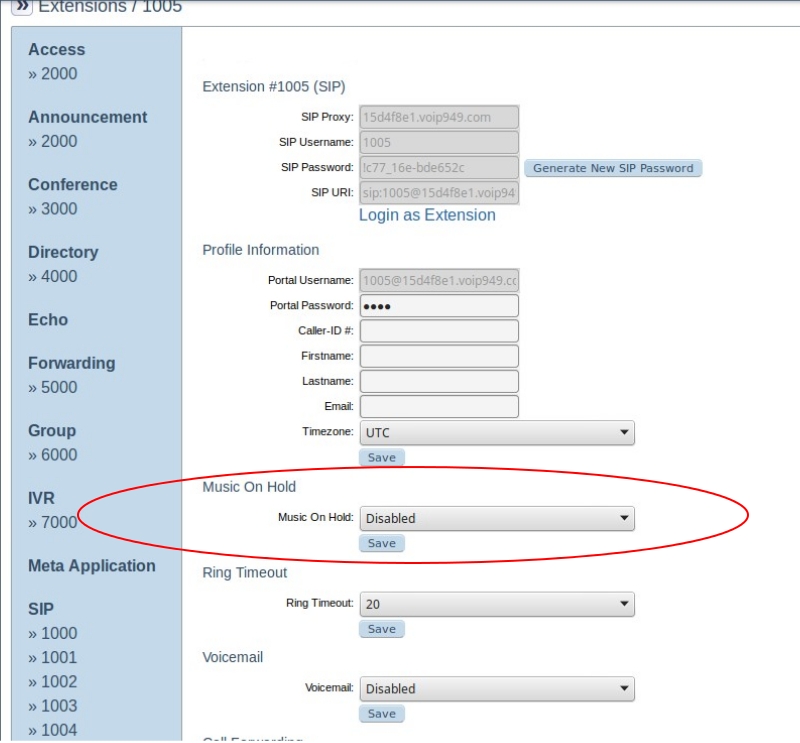
- Select an audio file from the
Music On Holddropdown to be played when the extension is placed on hold or leave set to Disabled to play no sound when the extension is on hold.
Step 5 - Extension Timeout
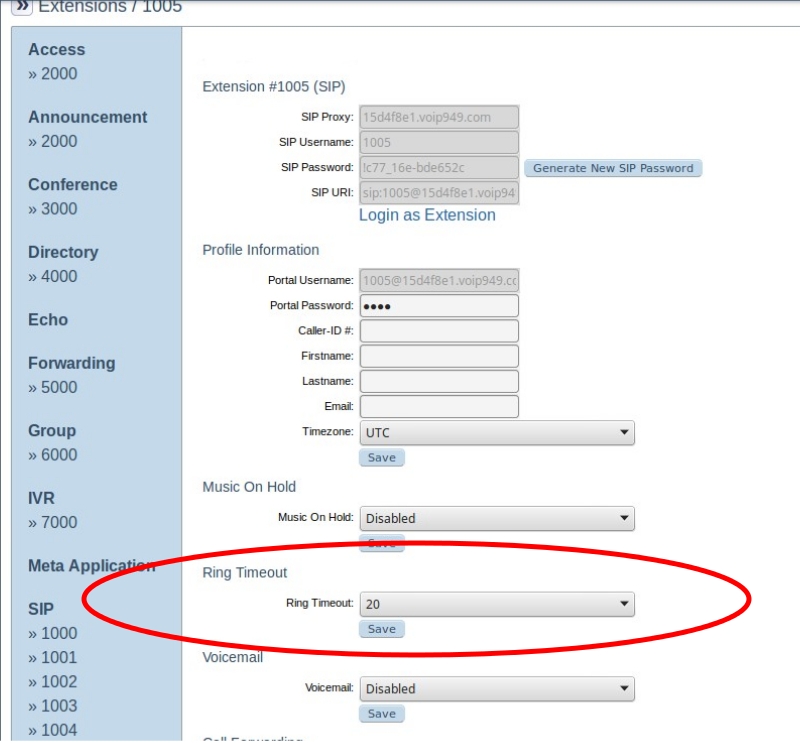
- Set a number of seconds (5 seconds corresponds to a single ring), for the extension to ring before timing out.
- Click the appropriate
Savebutton, the one just below theRing Timeoutdropdown.
Step 6 - Voicemail Selection
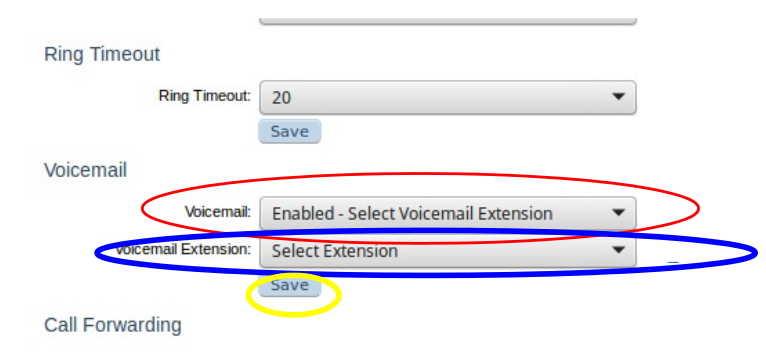
- Select a voicemail extension from the
Voicemail Extensiondropdown. - Click the ‘Save’ button just belown the
Voicemail Extensiondropdown. - Ignore steps 1 & 2 and leave
Voicemailset to Disabled if a voicemail box will not be assigned to the extension.
Step 7 - Call Forwarding
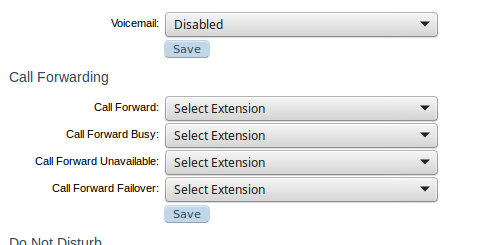
- The options for forwarding all calls to the extension, forwarding calls to the extension when the extension is busy, forwarding calls when the extension is unavailable and forwarding calls when the extension is not active or registered are visible.
Forwarding To an Extension
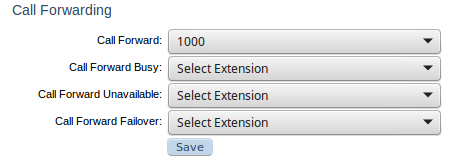
1. Each of the options under call forwarding can be set to forward to an external number set the dropdown value of Call Forward Call Forward Busy, Call Forward Unavailable or Call Forward Failover to one of the extension numbers and click Save.
External Number Forward

1. Each of the options under call forwarding can be set to forward to an external number set the dropdown value of Call Forward Call Forward Busy, Call Forward Unavailable or Call Forward Failover to External Forward, then set a 10 digit phone number as the value of the External Forward text box that appears, then click the Save button.
Forwarding All Calls
- Edit the
Call Forwarddropdown.
Forward If Unavailable
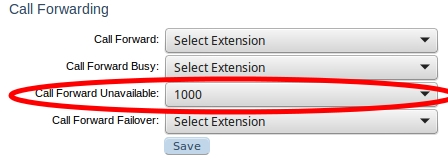
- Edit the
Call Forward Unavailabledropdown.
Forward If Busy
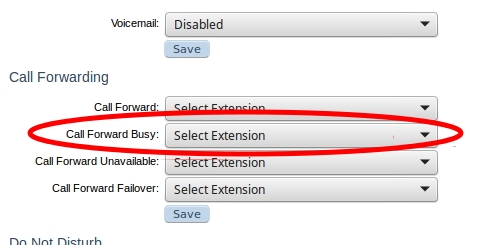
- Edit the
Call Forward Busydropdown.
Failover Forwarding
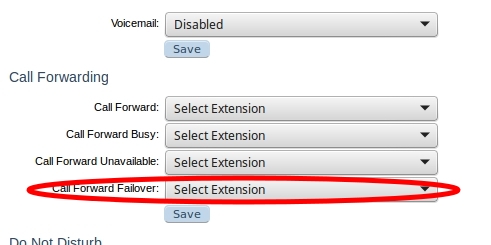
- Edit the
Call Forward Failoverdropdown.